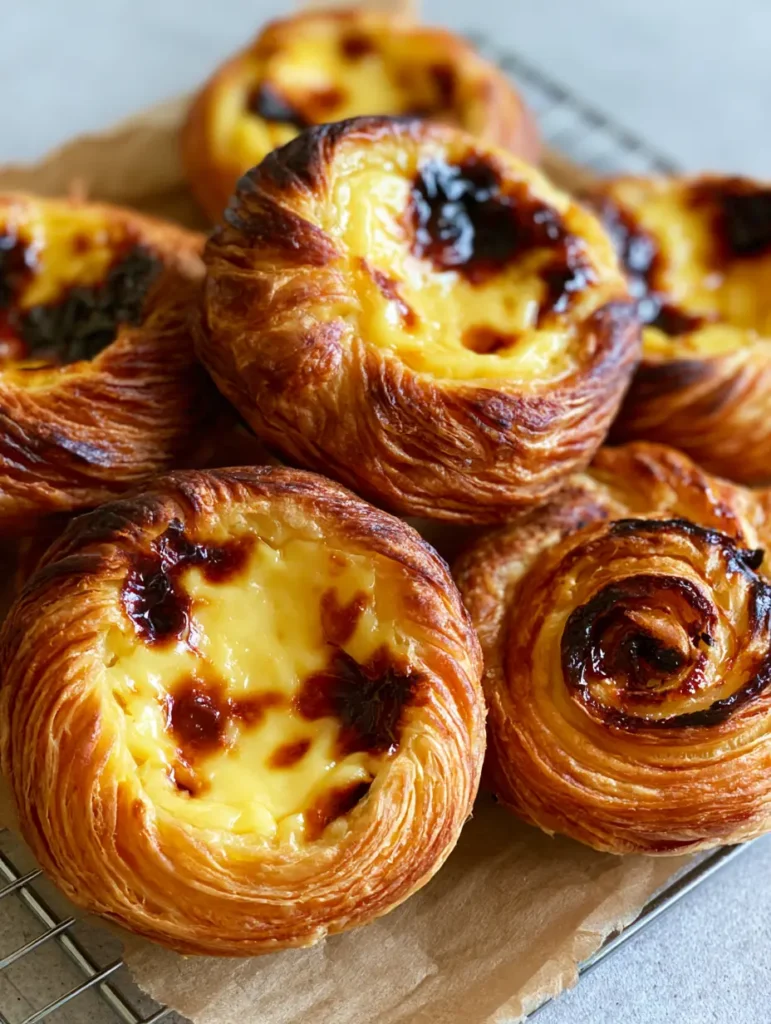
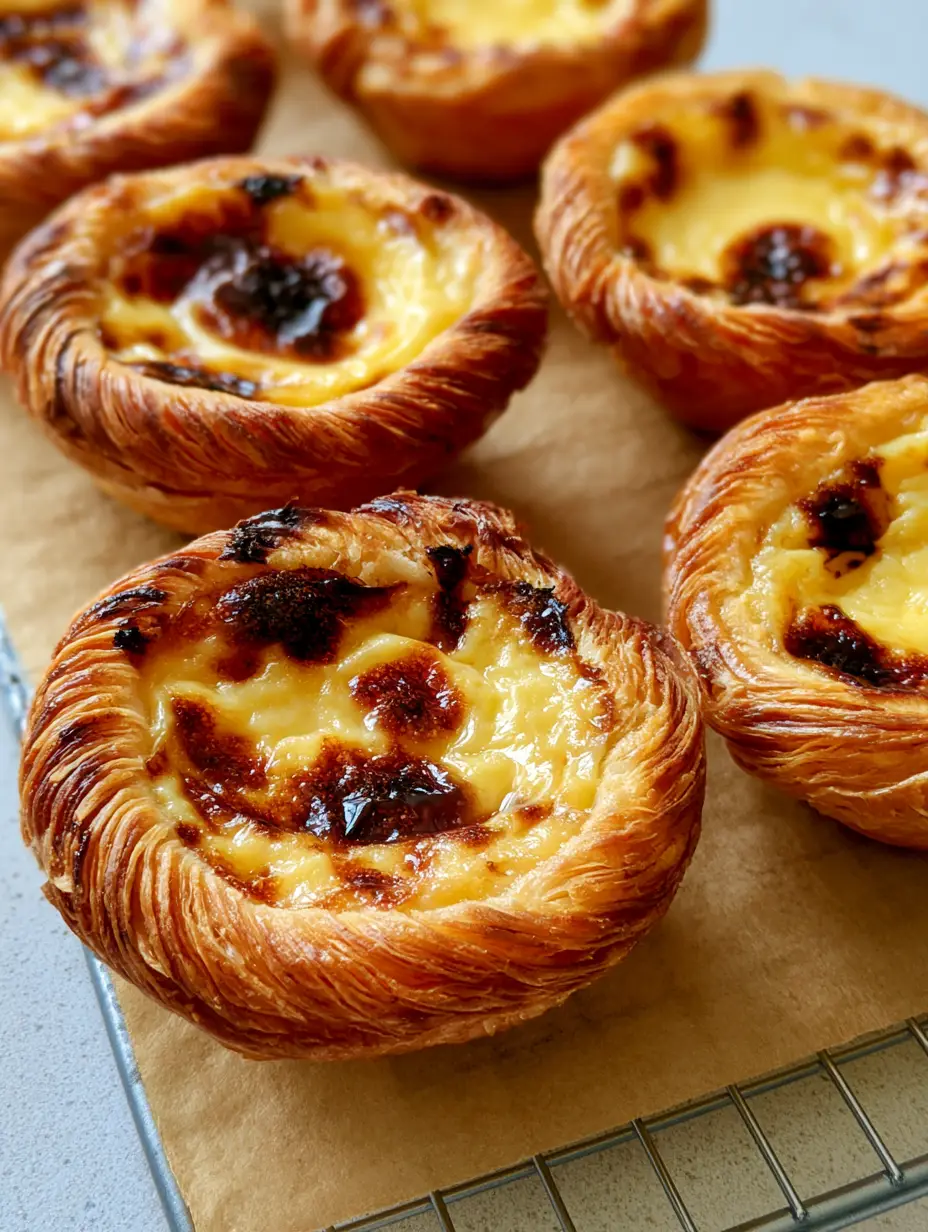
This Pastel de Nata Recipe is the ultimate guide to recreating the iconic Portuguese custard tart in your own kitchen. If you have ever wandered the streets of Lisbon, the intoxicating scent of warm cinnamon and blistered custard is unmistakable. These tarts are famous for their deep golden-brown, spiraled puff pastry base and a creamy center that features signature dark brown charred spots. By following this professionally developed guide, you will achieve that bakery-quality crunch and silky finish that makes this Pastel de Nata Recipe a viral sensation on Pinterest.
Why This Is The Best Pastel de Nata Recipe You Will ever Find
- Ultra-Flaky Laminated Crust: We use a specific rolling technique to create crispy concentric circles on the bottom of every tart.
- Perfectly Charred Custard: Learn the high-heat secret to achieving those distinct dark brown and black blistered spots without overcooking the filling.
- Professional Infusion: Our custard is infused with authentic cinnamon and lemon for a thick, pale yellow egg custard that melts in your mouth.
- Visual Masterpiece: Designed to look exactly like the tarts from Belém, complete with glossy surfaces and delicate crust textures.
Mastering this Pastel de Nata Recipe requires attention to detail, but the results are incredibly rewarding. Much like mastering a delicate layered cake, the secret lies in the temperature of your ingredients and the precision of your technique. Whether you are a seasoned baker or a curious home cook, these tarts will become your new signature dessert.
The Essential Ingredients for Authentic Portuguese Tarts
To achieve the specific Visual Recipe Blueprint of these tarts, every ingredient serves a scientific purpose. Do not skip the high-quality butter; it is the engine behind those flaky, laminated layers.
For the Laminated Pastry Base
All-Purpose Flour: 2 cups (250g). This provides the structure for the spiraled puff pastry without becoming too tough.
Unsalted Butter: 1 cup (226g), high-fat European style is best. This creates the steam necessary for the concentric circles to puff beautifully.
Cold Water: 3/4 cup (180ml). Keeping the water ice-cold ensures the butter doesn’t melt during the initial mixing phase.
Salt: 1/2 tsp (3g). A vital flavor enhancer that balances the sweetness of the filling.
For the Creamy Egg Custard Filling
Whole Milk: 1.5 cups (360ml). This creates the thick, creamy pale yellow base for the custard.
Granulated Sugar: 1 1/4 cups (250g). Used to create a simple syrup that stabilizes the egg yolks.
Egg Yolks: 6 large yolks. These provide the richness and the glossy custard finish seen in professional photos.
Cinnamon Stick & Lemon Peel: Essential for the aromatic profile. They are steeped in the milk to provide depth.
Cornstarch or Flour: 1/4 cup (30g). This ensures the custard sets perfectly and holds those caramelized charred spots on the surface.
Step-by-Step Instructions for the Perfect Pastel de Nata Recipe
Phase 1: Creating the Spiraled Laminated Pastry
Start by mixing your flour, salt, and water into a soft dough. Once rested, roll the dough into a large rectangle. Spread 1/3 of your softened butter over two-thirds of the dough. Fold it like a letter. Repeat this process until all the butter is incorporated, creating dozens of laminated layers.
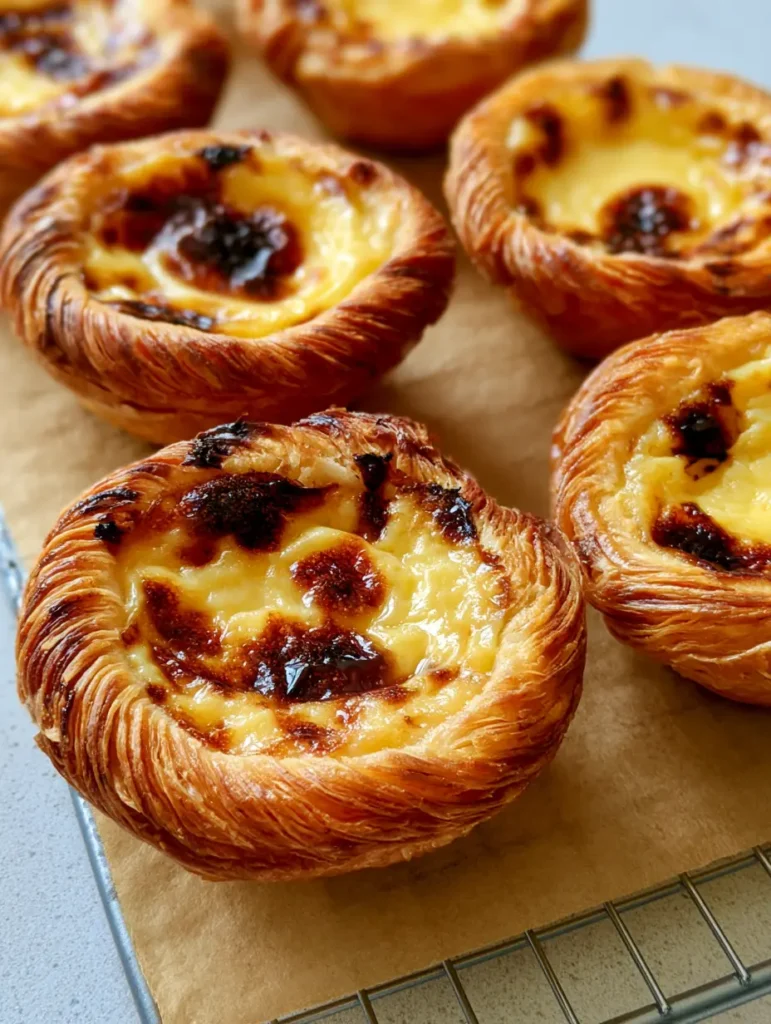
The final step for the crust is crucial: roll the dough into a tight log. Wrap it in plastic and chill. When you slice this log, you will see the concentric circles that create the beautiful bottom texture of the tart. If you enjoy working with dough, you might also like our savory puff pastry guide for more lamination practice.
Phase 2: Infusing the Custard Base
In a medium saucepan, whisk the milk and cornstarch until smooth. Add the cinnamon stick and a large strip of lemon peel (avoid the white pith). Heat the mixture over medium heat, stirring constantly until it thickens into a thick, pale yellow cream.
In a separate pot, boil your sugar and water until it reaches 220°F (105°C). Slowly drizzle this hot syrup into the milk mixture while whisking. This “tempering” process is similar to the precision needed for an almond dacquoise meringue. Once slightly cooled, whisk in the egg yolks until the mixture is glossy and smooth. Strain the mixture to remove the cinnamon and lemon.
Phase 3: Assembly and The High-Heat Bake
Preheat your oven to its highest setting—ideally 500°F (260°C) or even 550°F. Place a metal wire cooling rack on your counter and line a baking sheet with brown parchment paper. Place the sliced dough rounds into your muffin or tart tins. Use wet thumbs to press the dough from the center outward, creating a lip at the top.
Fill each pastry shell 3/4 full with the custard. Slide them into the oven. The Visual & Sensory Cues you are looking for include the pastry turning a deep golden-brown and the custard developing those iconic dark brown and black blistered charred spots. This usually takes 10-12 minutes.
Expert Tips for Success
- Cold Dough, Hot Oven: This is the golden rule. The cold butter hits the intense heat and evaporates instantly, creating the flaky, laminated layers.
- Don’t Overfill: Leave space at the top so the custard can bubble and char without spilling over the spiraled puff pastry.
- Use a Pizza Stone: If your oven struggles with bottom heat, place your tray on a preheated pizza stone to ensure the concentric circles on the bottom are crispy.
- The Thumb Trick: Keep a bowl of water nearby to dip your thumbs in while pressing the dough; this prevents sticking and ensures an even crust.
Storage, Reheating & Freezing
This Pastel de Nata Recipe is best enjoyed the day it is made, ideally while still slightly warm. However, you can store leftovers in an airtight container at room temperature for up to 2 days. To regain the crispy concentric circles, reheat them in a 350°F (175°C) oven for 5 minutes. Avoid the microwave, as it will make the laminated layers soggy.
You can freeze the unbaked tart shells in the tins for up to 3 months. Simply fill with fresh custard and bake directly from frozen, adding 3-5 minutes to the bake time.
What to Serve With This Portuguese Classic
In Lisbon, these are traditionally served with a dusting of powdered sugar and extra cinnamon. They pair beautifully with a strong espresso or a glass of Port wine. For a full brunch spread, consider serving these alongside a vibrant corn salad to balance the sweetness, or follow up a dinner of Chicken Marsala with these tarts as the ultimate finale.
Frequently Asked Questions
Yes, you can make the custard up to 24 hours in advance. Keep it in the fridge with plastic wrap pressed against the surface to prevent a skin from forming.
You can, but you must roll it out, spread it with extra butter, and roll it into a tight log to achieve the signature concentric circles on the bottom of the tart.
Use a metal tart tin or muffin tin rather than silicone. Placing the tin on a preheated baking stone or the very bottom rack of the oven also helps the concentric circles crisp up.
The charred spots require very high heat (at least 500°F/260°C). If your oven doesn’t reach this, use the broiler for the last 1-2 minutes, watching closely to avoid burning.
This usually happens if the egg yolks are added to the milk mixture while it is still boiling hot. Ensure you temper the yolks by slowly adding the warm syrup/milk mixture to them while whisking.
Ready to Bake the Ultimate Pastel de Nata Recipe?
Pastel de Nata Recipe: Authentic Portuguese Custard Tarts
Ingredients
Equipment
Method
- Mix flour, salt, and water until a soft dough forms. Rest for 15 minutes.
- Roll dough into a rectangle, spread butter, and fold. Repeat three times to create flaky layers.
- Roll the finished dough into a tight log. Chill for 2 hours, then slice into 12 even rounds to reveal concentric circles.
- Whisk milk and cornstarch. Add cinnamon and lemon peel. Heat until thick and pale yellow.
- Boil sugar and water to 220°F (105°C). Whisk into milk mixture, then whisk in egg yolks until glossy.
- Press dough rounds into tins. Fill 3/4 full with custard filling.
- Bake at 500°F (260°C) for 10-12 minutes until the tops have dark brown charred spots and the crust is golden.
Notes
Strain the custard through a fine-mesh sieve for a silky smooth texture.

Join the SavoryCrafted Community!
Did you achieve those perfect blistered spots? We want to see! Save this Pastel de Nata Recipe to your Dessert Recipes board on Pinterest so you never lose it. Follow @savorycrafted for more professional pastry secrets and viral kitchen hacks. If you made these, please leave a 5-star rating in the recipe card above and upload a photo of your tarts in the comments below. Happy baking!