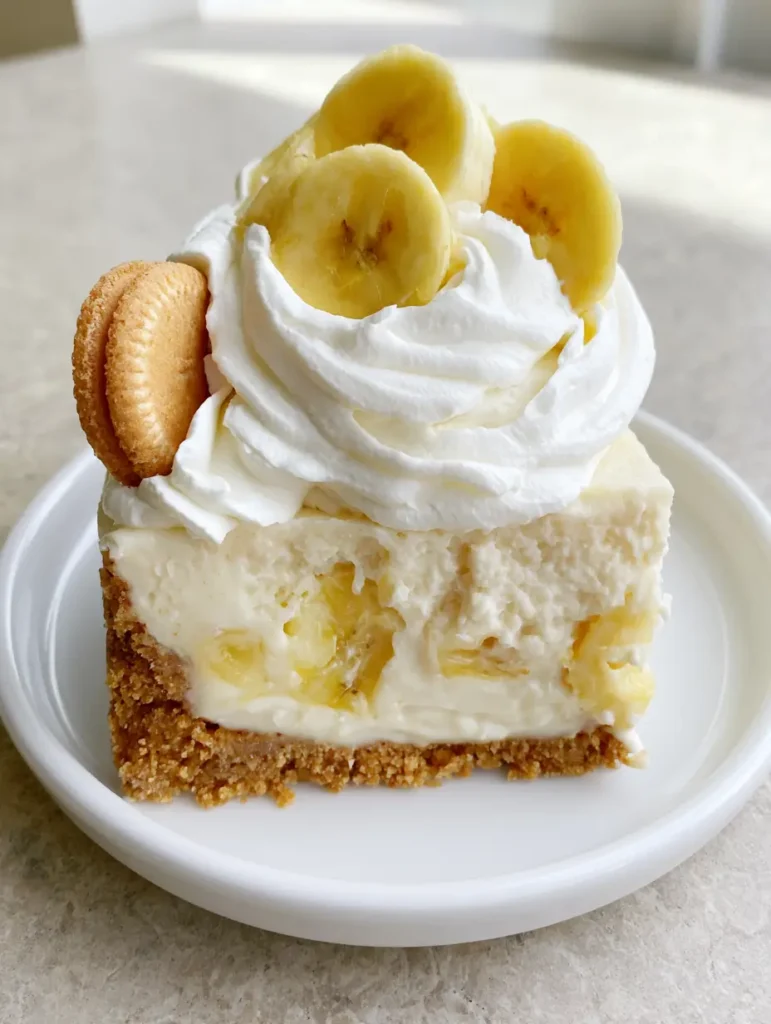
This No-Bake Banana Pudding Cheesecake is the ultimate fusion of two legendary desserts, combining the nostalgic comfort of classic Southern banana pudding with the rich, velvety decadence of a premium cheesecake. If you are looking for a show-stopping treat that requires zero oven time, this recipe is designed to impress both your palate and your Pinterest followers. Every bite features a crushed vanilla wafer crust, a fluffy filling with visible chunks of ripe yellow bananas, and a cloud-like topping of piped whipped cream. It is the perfect balance of airy and indulgent, making it a staple for summer potlucks, family gatherings, or any moment that calls for a slice of pure joy.
When you prepare this No-Bake Banana Pudding Cheesecake, you are creating more than just a dessert; you are building a multi-textured experience. From the golden-brown, buttery base to the stiff white whipped cream swirls, the visual appeal is just as important as the flavor profile. By following this guide, you will master the art of the no-bake setting process, ensuring your cheesecake is tall, sturdy, and ready for that perfect handheld smartphone photo that performs so well on social media. This recipe is a favorite on the savorycrafted Pinterest page because it delivers high-end bakery results with simple, approachable steps.
Why You Will Obsess Over This No-Bake Banana Pudding Cheesecake
- No-Bake Ease: Skip the water baths and the fear of cracks; this recipe relies on chilling time to achieve a perfect, sliceable set.
- Dynamic Textures: Experience the crunch of crushed vanilla wafer crust against the silkiness of the creamy cheesecake filling and soft banana chunks.
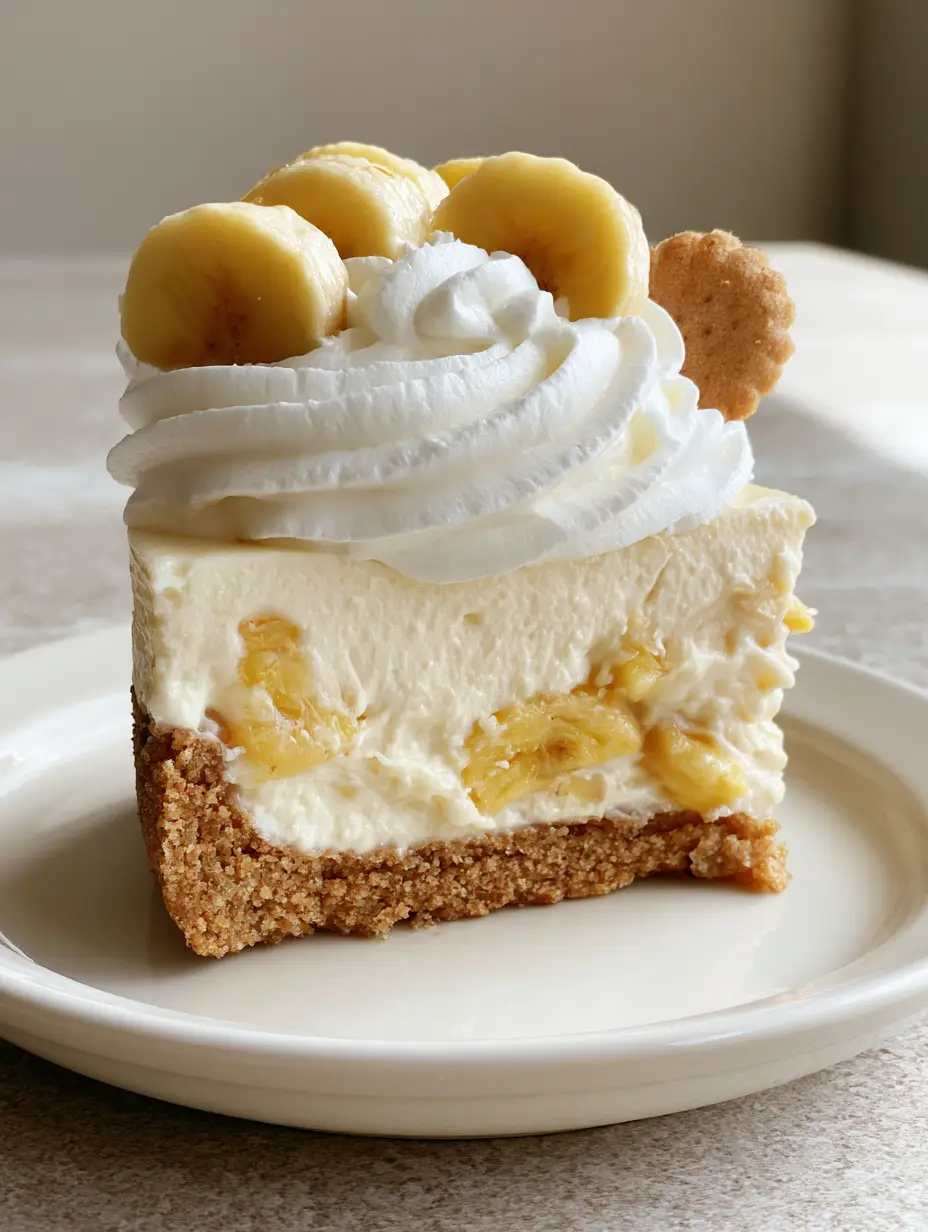
- Visual Masterpiece: The combination of fresh sliced bananas, cookie crumb garnish, and a single whole vanilla wafer tucked into the side creates a professional aesthetic.
- Maximum Stability: Using a blend of cream cheese and instant pudding ensures the filling stays thick and tall, even after hours on a dessert table.
The Secret Ingredients for a Sturdy Banana Pudding Cheesecake
Creating a No-Bake Banana Pudding Cheesecake that doesn’t collapse requires specific culinary building blocks. Each ingredient serves a structural and flavor-focused purpose to ensure your final slice looks exactly like our Visual Recipe Blueprint.
- Vanilla Wafers: You will need 3 cups (approx. 300g) of finely crushed wafers for the crust, plus extra for the cookie crumb garnish and whole wafers for the topping. These provide that signature nostalgic flavor.
- Unsalted Butter: 1/2 cup (113g) of melted butter acts as the “glue” for your golden-brown crushed vanilla wafer crust.
- Full-Fat Cream Cheese: 16 oz (450g) of room-temperature cream cheese provides the “tang” and the structural body. Do not use whipped or low-fat varieties.
- Instant Banana Cream Pudding Mix: One 3.4 oz (96g) box intensifies the banana flavor and helps stabilize the creamy cheesecake filling.
- Heavy Whipping Cream: 2 cups (480ml) of cold cream is divided between the filling and the stiff white whipped cream swirls on top. If you prefer a shortcut, you can reference our stabilized whipped cream frosting for even more height.
- Ripe Yellow Bananas: 4-5 large bananas are essential. Some are folded in as visible chunks, while others are used for the freshly sliced yellow banana rounds on top.
- Powdered Sugar: 1 cup (120g) provides sweetness without the grittiness of granulated sugar.
- Vanilla Extract: 2 teaspoons (10ml) of high-quality extract bridges the flavors of the dairy and fruit.
The Foundation: Crafting a Dense Vanilla Wafer Crust
The success of a No-Bake Banana Pudding Cheesecake starts at the bottom. A weak crust leads to a messy presentation, so we focus on compaction and chilling. Begin by pulsing your vanilla wafers in a food processor until they resemble fine sand. Combine the crumbs with melted butter and a pinch of salt to balance the sugar.
Press the mixture firmly into a 9-inch (23cm) springform pan. Use the bottom of a flat measuring cup to ensure the golden-brown crushed vanilla wafer crust is dense and even. This density is what supports the thick, tall slice you see in the Midjourney Prompt. Chill the crust in the freezer for at least 20 minutes before adding the filling to “set” the butter.
Developing the Creamy Filling with Visible Banana Chunks
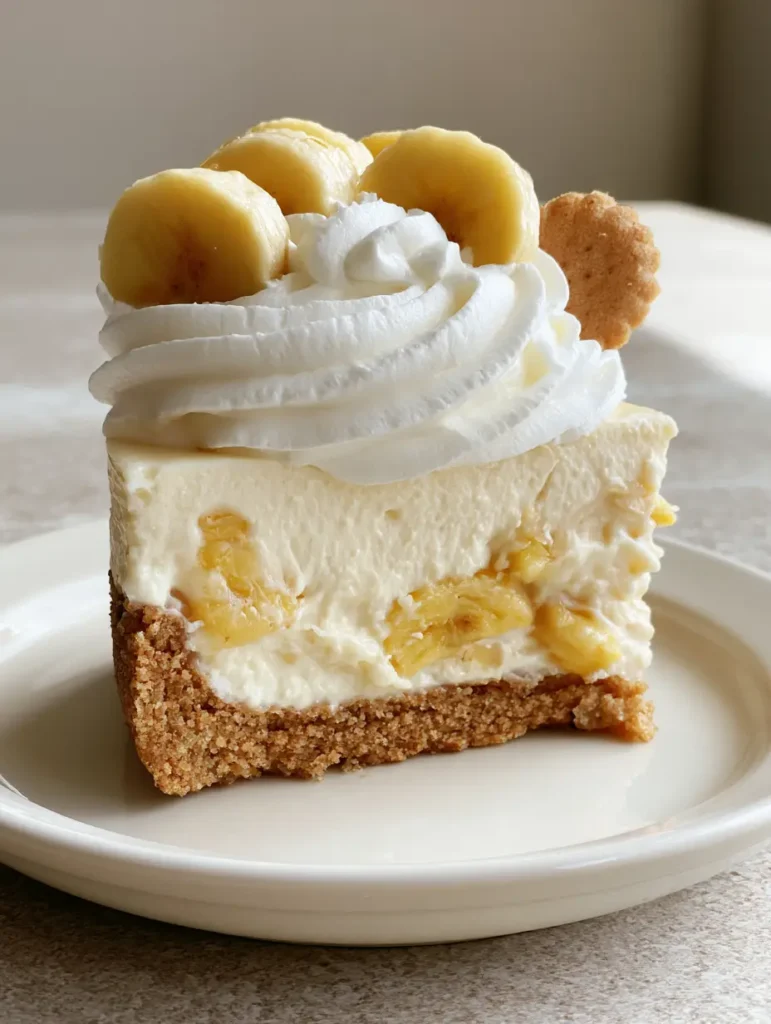
The creamy cheesecake filling must be light enough to be airy but dense enough to hold its shape. Start by beating your room-temperature cream cheese until it is completely smooth. Any lumps at this stage will ruin the “pale-ivory” aesthetic of the final dish. Slowly incorporate the powdered sugar, banana pudding mix, and vanilla extract.
In a separate chilled bowl, whip your heavy cream until stiff peaks form. Gently fold 2/3 of this whipped cream into the cream cheese mixture. Now, the Visual Recipe Blueprint specifically calls for visible chunks of ripe yellow bananas. Dice two of your bananas into 1/2-inch pieces and fold them in by hand. This ensures that every bite has a burst of fresh fruit, contrasting against the smooth pale-ivory cheesecake filling.
Step-By-Step Assembly for Pinterest Perfection
1. Layering and Smoothing
Pour the filling over your prepared crushed vanilla wafer crust. Use an offset spatula to smooth the top perfectly flat. This flat surface is the canvas for your garnishes. At this point, the cheesecake needs to chill for a minimum of 6 hours, though overnight is preferred for the cleanest slices.
2. The Piping Technique
Once the cheesecake is set, it is time for the stiff white whipped cream garnish. Using a large star tip (like a 1M), pipe thick, piped swirls around the perimeter of the cake. This adds the “tall” vertical height that makes this dessert pop on a light-grey stone countertop. For more inspiration on fruit-based desserts, check out our Strawberry Shortcake Sheet Cake.
3. The Final Garnishes
Just before serving, slice your remaining bananas into rounds of freshly sliced yellow bananas. Place them nestled against the whipped cream swirls. Sprinkle cookie crumb garnish over the center and tuck a single whole vanilla wafer into the side of each cream swirl. This exact arrangement creates the “unedited handheld smartphone photo” look that captures viral attention.
Expert Tips for the Best No-Bake Cheesecake
- Prevent Browning: Toss your freshly sliced yellow bananas in a little lemon juice or pineapple juice to prevent oxidation before placing them on the top of the slice.
- Temperature Matters: Ensure your cream cheese is truly at room temperature. If it is cold, it will not blend with the instant banana cream pudding mix, resulting in a grainy texture.
- Clean Slices: To get a thick, tall slice with clean edges, dip your knife in hot water and wipe it dry between every single cut.
- Stabilization: If you are serving this at an outdoor event, consider using a pudding-based stabilizer like our chocolate pudding frosting technique to keep the cream from melting.
Storage, Reheating & Freezing
The No-Bake Banana Pudding Cheesecake is a fresh dairy product and should always be stored in the refrigerator. Cover it loosely with plastic wrap or keep it in a cake carrier to prevent it from absorbing fridge odors. It will stay fresh for up to 3 days, though the fresh sliced bananas on top are best enjoyed within 24 hours.
While you can freeze this cheesecake (minus the fresh banana garnish), the texture of the ripe yellow bananas folded in may change slightly upon thawing. If freezing, wrap the entire cake in double layers of plastic wrap and aluminum foil for up to 1 month. Thaw in the refrigerator overnight before garnishing and serving.
What to Serve With This Dessert
This cheesecake is quite rich, so it pairs beautifully with lighter, refreshing options. If you are hosting a summer BBQ, serve it after a meal of frozen peach smoothies or alongside a spread of Pineapple Lemonade Candy Apples. The creamy banana flavors also complement salty snacks, making it a great follow-up to a savory main course.
Frequently Asked Questions
Absolutely! Simply swap the standard vanilla wafers for your favorite gluten-free vanilla cookie brand and ensure your pudding mix is certified gluten-free.
Yes! This recipe specifically recommends Instant Banana Cream Pudding mix to provide that signature flavor and help stabilize the cheesecake filling.
A springform pan is recommended for a thick, tall slice that looks professional. If you don’t have one, you can use a deep-dish pie plate, though the slices won’t be as tall.
Gently toss your sliced banana rounds in a small amount of lemon or lime juice before placing them on the cheesecake. The acid prevents oxidation and keeps them bright yellow.
This usually happens if the heavy cream wasn’t whipped to stiff peaks before folding, or if the cream cheese was too warm. Ensure it chills for at least 6-8 hours to fully set.
The Ultimate No-Bake Banana Pudding Cheesecake Recipe
No-Bake Banana Pudding Cheesecake: The Best Creamy Southern Dessert
Ingredients
Equipment
Method
- Combine crushed vanilla wafers and melted butter until the mixture resembles wet sand.
- Firmly press into a 9-inch springform pan and freeze for 20 minutes to set.
- Beat cream cheese, powdered sugar, dry pudding mix, and vanilla until smooth and ivory-colored.
- In a separate bowl, whip heavy cream to stiff peaks, then fold into the cream cheese mixture.
- Gently fold in the diced banana chunks to ensure visible fruit throughout the cheesecake.
- Spread filling over crust and refrigerate for at least 6 hours or overnight.
- Pipe whipped cream swirls, top with banana slices, cookie crumbs, and whole wafers before serving.
Notes
Brush banana slices with lemon juice to keep them yellow and fresh for hours.
Join the Savory Crafted Community!
If you loved this No-Bake Banana Pudding Cheesecake, please help us grow by saving this recipe to your “Dessert Goals” board on Pinterest! We love seeing your creations—snap a photo of your thick, tall slice and share it in the comments below. Don’t forget to follow savorycrafted for more viral-worthy recipes and give this recipe a 5-star rating if it satisfied your sweet tooth!