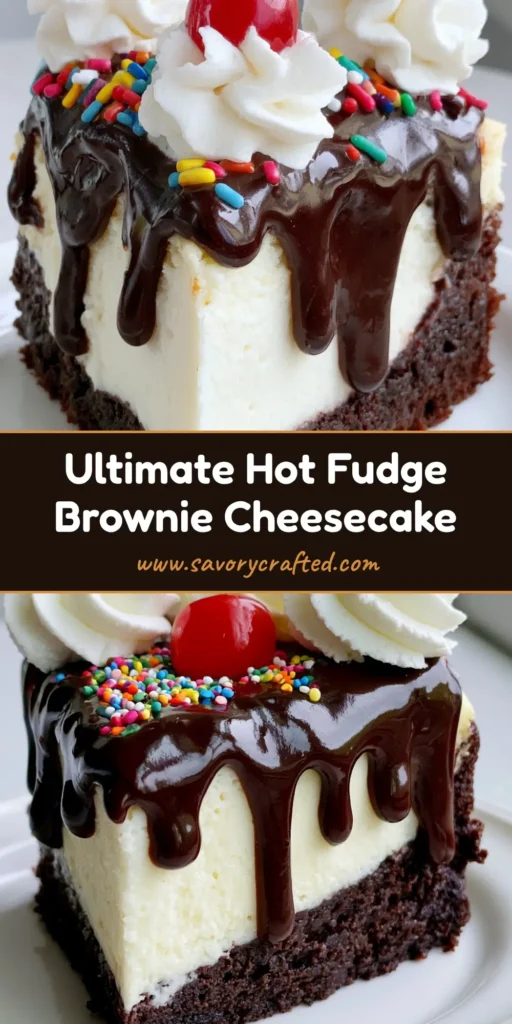
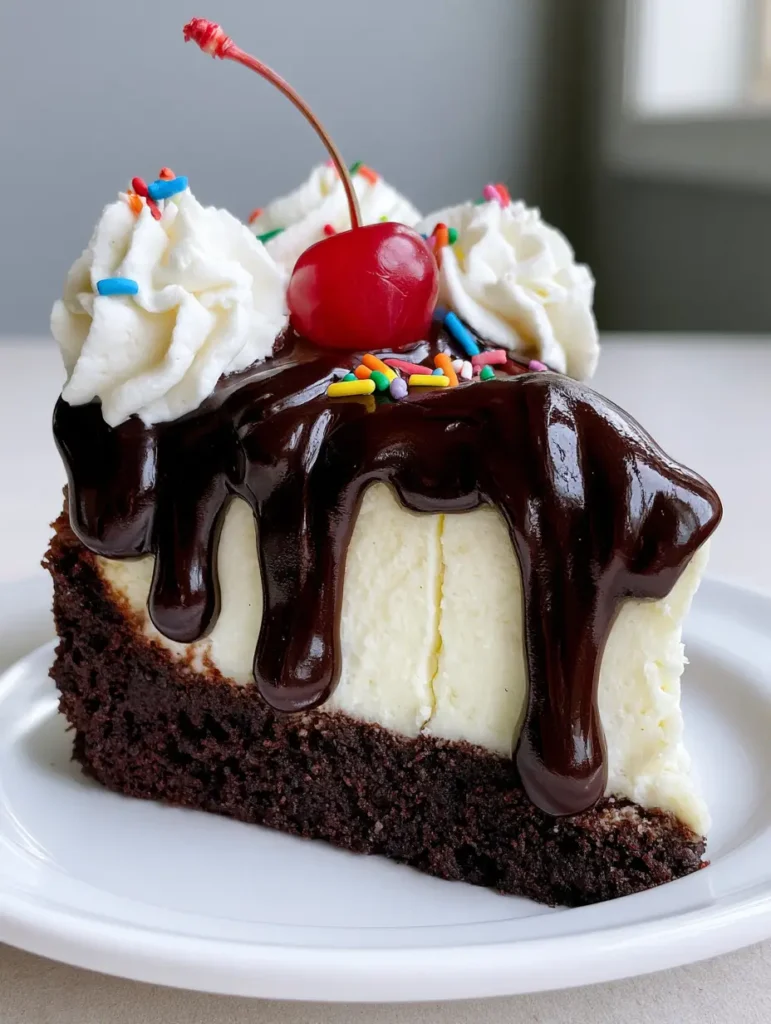
Hot Fudge Sundae Brownie Cheesecake is the ultimate dessert mashup, combining the chewy, dense texture of a gourmet dark chocolate brownie with the silky elegance of a classic vanilla cheesecake. This show-stopping treat recreates the nostalgic joy of an ice cream parlor sundae in a sophisticated, sliceable format that will stop any Pinterest scroller in their tracks. Whether you are hosting a summer celebration or looking for a decadent holiday centerpiece, this Hot Fudge Sundae Brownie Cheesecake delivers layers of indulgence that satisfy every sweet craving.
Why You Will Love This Show-Stopping Sundae Dessert
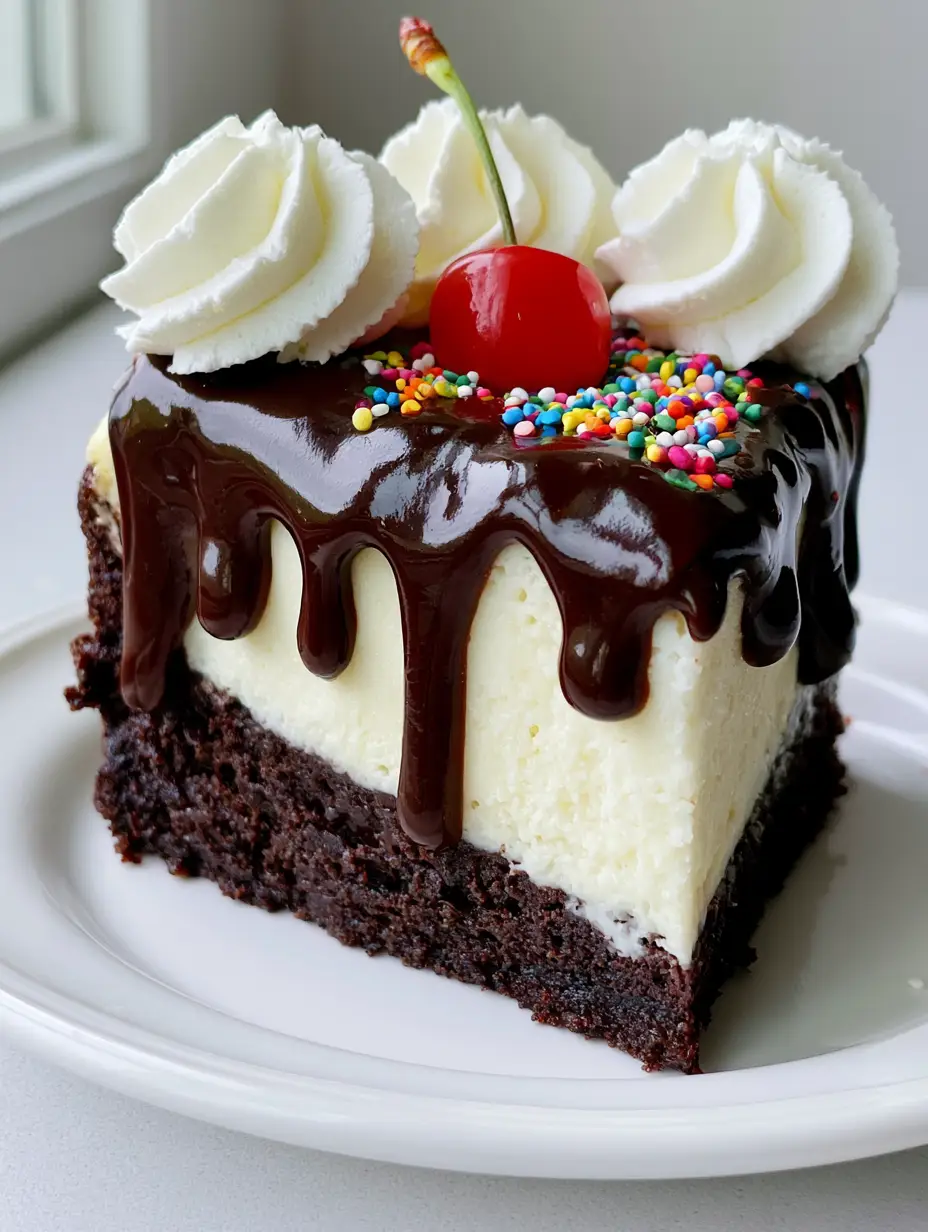
- Triple-Layer Texture: You get a dense, fudgy dark chocolate foundation, a velvety smooth cream cheese center, and a glossy, thick fudge topping.
- Visual Masterpiece: With piped whipped cream swirls and a bright red maraschino cherry, it looks exactly like an old-fashioned sundae.
- Perfect for Entertaining: It is naturally tall and impressive, making it the perfect focal point for any dessert table.
- Make-Ahead Friendly: This cheesecake actually tastes better after a night in the fridge, saving you stress on the day of your event.
If you love the combination of chocolate and cream cheese, you might also want to try these brownie bottom cheesecake bites for a bite-sized version of this flavor profile.
Essential Ingredients for the Ultimate Brownie Layer
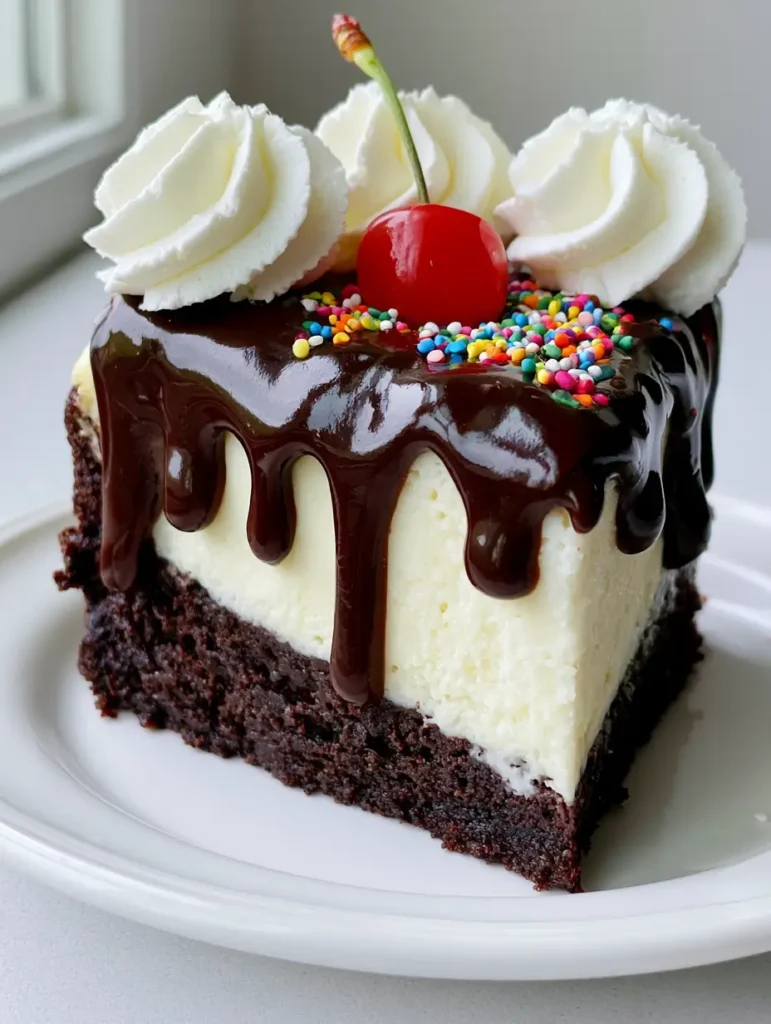
To achieve that dense fudgy dark chocolate brownie base seen in the visual blueprint, we avoid leavening agents like baking powder. This ensures the base remains chewy and supports the weight of the cheesecake.
Unsalted Butter: 3/4 cup (170g). We melt the butter to create a tighter, fudgier crumb rather than a cakey one.
Bittersweet Chocolate: 4 oz (115g). Using high-quality chopped chocolate instead of just cocoa powder provides a richer mouthfeel and that deep dark color.
Granulated Sugar: 1 cup (200g). Sugar does more than sweeten; it helps create the iconic crackly top where the brownie meets the cheesecake.
Large Eggs: 2 eggs. These provide the structure and fat needed for a rich, moist base.
Vanilla Extract: 1 tablespoon (15ml). A high dose of vanilla balances the intensity of the dark chocolate.
All-Purpose Flour: 3/4 cup (95g). Just enough to hold everything together without making it bread-like.
Dutch-Processed Cocoa Powder: 1/4 cup (25g). This provides the “dark chocolate” aesthetic required for our visual recipe blueprint.
The Secret to Creamy White Cheesecake Filling
For the middle layer, we want a smooth, velvety white vanilla cheesecake. The goal is a stark color contrast against the dark brownie base.
Full-Fat Cream Cheese: 24 oz (680g). It is imperative to use brick-style cream cheese at room temperature to avoid lumps.
Granulated Sugar: 3/4 cup (150g). This provides sweetness without discoloring the white filling.
Sour Cream: 1/2 cup (120ml). This adds a subtle tang and ensures the texture remains creamy rather than heavy.
Large Eggs: 3 eggs. Add them one at a time to prevent over-aerating the batter, which causes cracks.
Heavy Cream: 1/4 cup (60ml). This thins the batter slightly for a more “velvety” finish.
If you prefer fruitier variations, check out our strawberry shortcake sheet cake for a lighter summer option.
Garnish Essentials: The Sundae Toppings
The “Sundae” part of the Hot Fudge Sundae Brownie Cheesecake comes from the finishing touches. These are what create the viral Pinterest appeal.
Glossy Hot Fudge Sauce: 1 cup (240ml). You want a high-quality, thick sauce that can be warmed to create those heavy drips down the side of the slice.
Heavy Whipping Cream: 1 cup (240ml). Whipped until stiff peaks form to create the piped swirls. You can also use a stable whipped cream frosting if you need the swirls to hold up for several hours.
Maraschino Cherries: At least 12 cherries with stems. The stem is vital for that professional, “handheld smartphone photo” look.
Rainbow Sugar Sprinkles: 2 tablespoons (30g). Multicolored sprinkles provide the pop of color against the white whipped cream and dark fudge.
Step-By-Step: Crafting the Dense Brownie Foundation
Preparing the Dark Chocolate Base
Start by preheating your oven to 325°F (165°C). Grease a 9-inch (23cm) springform pan and line the bottom with parchment paper. This is a tall cheesecake, so ensure your pan sides are at least 3 inches high.
In a microwave-safe bowl, melt the butter and bittersweet chocolate together in 30-second increments. Stir until completely glossy and smooth. Visual Cue: The mixture should look like liquid obsidian.
Whisk in the sugar, then add the eggs one at a time. Stir in the vanilla. Sift the flour and cocoa powder over the wet ingredients and fold gently until no streaks remain. Pour this into the prepared pan and bake for 20 minutes. It will not be fully cooked; it just needs to be set enough to hold the cheesecake layer.
Step-By-Step: The Velvety White Cheesecake Layer
Mixing the Creamy Center
While the brownie base pre-bakes, beat the room temperature cream cheese and sugar on medium speed until completely smooth. Sensory Cue: You should not hear any “grittiness” from the sugar against the bowl.
Add the sour cream and vanilla, mixing until combined. Reduce speed to low and add the eggs one by one. Pro Tip: Mixing on low speed prevents air bubbles, which are the enemy of a “clean vertical cut.”
Pour the white cheesecake batter over the par-baked brownie base. Smooth the top with an offset spatula. Wrap the bottom of the springform pan in three layers of heavy-duty aluminum foil and place it in a large roasting pan filled with 1 inch (2.5cm) of hot water. This water bath is essential for that creamy, crack-free finish.
The Slow Bake and Chill
Bake at 325°F (165°C) for 50-60 minutes. The edges should be set, but the center should still have a slight jiggle like Jell-O. Turn off the oven, crack the door, and let it sit for one hour. This gradual cooling prevents the cheesecake from pulling away from the brownie base.
Chill in the refrigerator for at least 6 hours, preferably overnight. A cold cheesecake is required to achieve the “clean vertical cut” seen in our photography.
Assembling the Hot Fudge Sundae Masterpiece
Adding the Glossy Drips
Once chilled, remove the cheesecake from the springform pan. Warm your hot fudge sauce until it is pourable but not hot (about 90°F / 32°C). Pour the fudge over the top of the cheesecake, using a spoon to nudge the sauce over the edges to create heavy drips down the sides.
The Final Garnish
Whip the heavy cream and sugar until very stiff. Transfer to a piping bag fitted with a large star tip. Pipe stiff white whipped cream swirls around the perimeter of the cake. Place a bright red maraschino cherry with a stem in the center of each swirl. Finally, scatter the rainbow sugar sprinkles over the top for that festive finish.
For a different take on decadent cheesecake bases, you might enjoy our cookie dough cheesecake (coming soon) recipe.
Expert Tips for Success
- Room Temperature is Non-Negotiable: Your cream cheese, eggs, and sour cream must be at room temperature to ensure a velvety, lump-free texture.
- The “Hot Knife” Trick: To get the “clean vertical cut” shown in the photos, dip a sharp knife in hot water and wipe it dry between every single slice.
- Don’t Overbeat: Once the eggs are added to the cheesecake, stop mixing as soon as they are incorporated. Over-mixing leads to a “soufflé” effect where the cake rises and then collapses.
- Fudge Temperature: If the fudge is too hot, it will melt the cheesecake. If it is too cold, it won’t drip. It should feel like lukewarm bathwater.
Storage, Reheating & Freezing
To Store: Keep the Hot Fudge Sundae Brownie Cheesecake in an airtight container in the refrigerator for up to 5 days. Note that the whipped cream may lose its stability after 48 hours.
To Freeze: You can freeze the baked cheesecake (without the fudge and whipped cream) for up to 3 months. Wrap tightly in plastic wrap and then aluminum foil. Thaw in the fridge overnight before adding the toppings.
Note: We do not recommend reheating this dessert, as it is designed to be eaten chilled to maintain the structural integrity of the fudge and cheesecake layers.
What to Serve With This
Since this is an incredibly rich dessert, it pairs beautifully with a cup of strong, bitter black coffee or an espresso to cut through the sugar. For a party spread, consider serving it alongside lighter options like a hawaiian cheesecake salad or a refreshing frozen peach smoothie.
Frequently Asked Questions
Absolutely! A homemade ganache or cocoa-based fudge sauce works beautifully as long as it is thick enough to hold the ‘drip’ look without running off the cake.
Yes, but ensure it is a ‘fudgy’ style mix. Omit any water or extra leavening to keep the base dense enough to support the cheesecake.
The secret is chilling the cheesecake for at least 6 hours and using a sharp knife dipped in hot water and wiped dry before every single cut.
Homemade whipped cream lasts about 24-48 hours. For longer-lasting swirls, use a stabilized whipped cream with a bit of gelatin or mascarpone.
Cracks are usually caused by over-mixing the eggs or cooling the cake too quickly. Use a water bath and let it cool in the oven with the door cracked.
The Ultimate Hot Fudge Sundae Brownie Cheesecake Recipe
Hot Fudge Sundae Brownie Cheesecake with Fudgy Base
Ingredients
Equipment
Method
- Melt butter and chocolate; whisk in sugar and eggs. Fold in flour and cocoa.
- Bake in springform pan at 325°F (165°C) for 20 minutes.
- Beat cream cheese and sugar until smooth. Add sour cream and eggs on low speed.
- Pour over brownie. Bake in water bath for 60 minutes. Cool slowly.
- Top with warmed fudge sauce, piped whipped cream, cherries, and sprinkles.
Notes
Ensure all dairy is room temperature to avoid lumps.
Join the SavoryCrafted Community!
Did you make this Hot Fudge Sundae Brownie Cheesecake? We want to see your beautiful layers! Save this recipe to your “Dessert Goals” board on Pinterest so you never lose it. If you whipped up this decadent treat, please leave a 5-star rating in the recipe card below and snap a photo to share in the comments. Follow @savorycrafted for more viral-ready recipes that taste even better than they look!