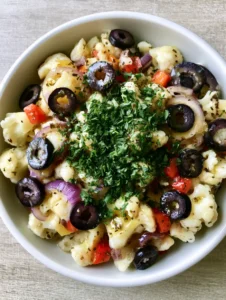
There is a profound difference between a store-bought dip and a truly Authentic Tzatziki Recipe made in your own kitchen. The visual of a rustic white ceramic bowl filled with velvety white yogurt is enough to transport anyone to a seaside taverna in Santorini.
In this guide, we are recreating that exact handheld smartphone aesthetic: a thick, luscious base mixed with finely shredded cucumber, topped with a pool of translucent golden extra virgin olive oil. This isn’t just a recipe; it’s a masterclass in Mediterranean texture and temperature.
Every element, from the sprigs of fresh bright green dill to the two whole dark purple Kalamata olives resting on top, serves a specific culinary purpose. Whether you are dipping charred pita wedges or dolloping it over grilled meats, this recipe delivers a professional-grade result every time.

Why This Is the Only Greek Cucumber Dip You Will Ever Need
- The Texture Matrix: By using high-protein Greek yogurt and a specific draining technique, we achieve a velvety, thick consistency that holds its shape.
- Aromatic Depth: The combination of fresh-cut dill and pungent garlic creates a multi-layered flavor profile that evolves as it sits.
- Visual Sophistication: We focus on the “well” technique, ensuring your olive oil drizzle looks like a professional food stylist prepared it.
- The Perfect Crunch: We pair this creamy masterpiece with triangular pita wedges featuring slight charred marks for a smoky, crispy contrast.
The Components of a Masterpiece: Ingredients and Their Roles
Thick Greek Yogurt (Strained): 2 cups (450g). This is the structural foundation; use full-fat (5% or 10%) yogurt for that iconic, velvety mouthfeel described in our visual blueprint.
English Cucumber: 1 large (approx. 300g). Chosen for its thin skin and smaller seeds, providing the necessary green flecks without excess bitterness or wateriness.
Extra Virgin Olive Oil (EVOO): 3 tbsp (45ml) plus extra for drizzling. High-quality EVOO provides the “translucent golden” pool in the center that adds a peppery, fruity finish to every bite.
Fresh Dill Sprigs: 1/4 cup (10g) finely chopped, plus extra for garnish. Fresh dill is non-negotiable for that bright, herbaceous aroma that cuts through the richness of the dairy.
Garlic Cloves: 2-3 cloves (approx. 10g). Microplaned into a paste to ensure the flavor is evenly distributed without any harsh, crunchy bites of raw garlic.
Lemon Juice: 1 tbsp (15ml). The essential “invisible” ingredient that provides acidity to brighten the fats in the yogurt and oil.
Kosher Salt: 1 tsp (6g). Used both for seasoning and for the critical “sweating” process that draws moisture out of the shredded cucumber.
Kalamata Olives: 2 whole olives. These provide a salty, briny pop of color and flavor that sits perfectly atop the white yogurt base.
Pita Bread: 2-3 rounds. Cut into triangular wedges and toasted until they show slight charred marks for the ultimate dipping vessel.
Essential Tools for a Professional Finish
To achieve the “shredded but not mushy” cucumber texture, a standard box grater is your best friend. Use the large holes to create distinct strands that will be visible in the final Authentic Tzatziki Recipe.
You will also need a clean kitchen towel or fine-mesh cheesecloth. This is the secret weapon for removing 99% of the cucumber’s water content, which prevents your dip from becoming a soup after an hour in the fridge.
Finally, a rustic white ceramic bowl is recommended for serving. The contrast between the white bowl, the white yogurt, and the golden oil creates that high-end, soft natural daylight look found in professional food photography.

The Science of the Perfect Squeeze: Step-by-Step Instructions
Preparing the Cucumber Foundation
Begin by washing your English cucumber. You can leave the skin on for those beautiful green flecks mentioned in our visual prompt, or peel it partially for a striped effect.
Grate the cucumber using the large holes of your box grater. Immediately toss the shreds with 1/2 teaspoon of kosher salt in a small bowl and let them sit for 10 minutes.
Place the salted cucumber in your cheesecloth and squeeze with all your might. You should see a significant amount of green liquid being expelled; continue until the cucumber feels like a dry ball of fiber.
Building the Velvety Yogurt Base
In a medium mixing bowl, combine the 2 cups (450g) of thick Greek yogurt with your microplaned garlic paste and lemon juice. Use a whisk to whip the yogurt slightly until it looks glossy and smooth.
Fold in the dried cucumber shreds and the finely chopped dill. At this stage, add 1 tablespoon (15ml) of extra virgin olive oil directly into the mixture to emulsify the flavors.
Taste the mixture. Depending on the tartness of your yogurt, you may need an extra pinch of salt to make the flavors truly “pop” against the neutral light grey stone countertop setting.
The Art of the Garnish
Transfer the mixture to your rustic white ceramic bowl. Using the back of a large spoon, create a shallow well in the center of the yogurt by swirling in a circular motion.
Slowly pour your translucent golden extra virgin olive oil into that well. It should pool beautifully, creating a visual contrast against the white yogurt.
Place two whole dark purple Kalamata olives on top and nestle several sprigs of fresh bright green dill around them. This creates the exact handheld smartphone photo aesthetic we are aiming for.
Toasting the Pita Wedges
Brush your pita wedges lightly with olive oil and place them in a hot cast-iron skillet or under a broiler. Look for slight charred marks and a stiffening of the bread.
Arrange the warm wedges beside the bowl on your serving surface. The heat from the pita will slightly warm the surface of the tzatziki, releasing the aromas of the dill and garlic as you serve.
Expert Tips for a Faultless Authentic Tzatziki Recipe
- Temperature Control: Always serve your tzatziki chilled, but your pita wedges hot. This temperature contrast is a hallmark of high-end Mediterranean dining.
- The Overnight Cure: While you can eat this immediately, the garlic and dill flavors fully integrate and mellow after 2-4 hours in the refrigerator.
- Fat Content Matters: Do not use fat-free yogurt. The “velvety white” appearance and the way the oil pools in the center require the structural integrity of full-fat dairy.
- Garlic Intensity: If you find raw garlic too sharp, let the minced garlic sit in the lemon juice for 5 minutes before adding it to the yogurt to “cook” out the harshness.
Preservation and Storage Wisdom
This Authentic Tzatziki Recipe stores beautifully in an airtight container for up to 4 days. You may notice a small amount of liquid separating on top; this is natural and can be stirred back in.
Do not freeze tzatziki. The cellular structure of the cucumber and the emulsion of the yogurt will break down, resulting in a grainy, watery mess upon thawing.
If preparing for a party, store the garnished olives and dill separately and add them just before serving to keep the presentation looking fresh and vibrant.
What to Serve With This Mediterranean Classic
This dip is incredibly versatile and serves as the perfect anchor for a larger Greek feast. It is the essential companion for Greek Chicken Gyros, where the coolness of the yogurt balances the spiced meat.
For a vegetarian spread, pair it with a Roasted Vegetable Orzo Salad or a refreshing Mediterranean Pasta Salad. The creamy texture of the dip complements the acidity of the vinaigrettes used in these dishes.
If you want to stray from traditional pita, try serving it with warm Garlic Naan Bread for a cross-cultural fusion, or alongside Grilled Seafood Skewers for a light, high-protein summer dinner.
Frequently Asked Questions
You can, but you must strain it through a cheesecloth for at least 4 hours (or overnight) in the fridge to reach the necessary thickness. Regular yogurt is too watery for an authentic result without this step.
It is not required. Leaving the skin on provides beautiful green flecks and extra nutrients. However, if using a standard cucumber with thick, waxy skin, it is better to peel it; for English cucumbers, the skin is tender enough to keep.
To mellow the garlic, microplane it into the lemon juice and let it sit for 5 minutes before mixing it into the yogurt. This ‘cooks’ the garlic slightly, removing the sharp raw bite while keeping the flavor.
Use a high-quality Cold-Pressed Extra Virgin Olive Oil. Since it isn’t being cooked, you will taste the full nuances of the oil, so a fruity or peppery Greek oil is ideal for authenticity.
This usually happens because the cucumber wasn’t squeezed dry enough. Even a small amount of residual moisture will release over time and thin out the yogurt base.
The Ultimate Authentic Tzatziki Recipe

Authentic Tzatziki Recipe: The Secret to the Creamiest Greek Yogurt Dip
Ingredients
Equipment
Method
- Shred the cucumber using the large holes of a box grater. Toss with 1/2 tsp salt and let sit for 10 minutes to draw out moisture.
- Place shredded cucumber in cheesecloth and squeeze firmly until no more liquid escapes. The cucumber should be very dry.
- In a bowl, combine yogurt, garlic paste, lemon juice, 1 tbsp olive oil, and the remaining salt. Whisk until velvety white and smooth.
- Gently fold the dry cucumber and chopped dill into the yogurt mixture until evenly distributed.
- Transfer to a white ceramic bowl. Use a spoon to create a shallow well in the center and fill with a pool of golden extra virgin olive oil.
- Top with two Kalamata olives and sprigs of fresh dill. Serve alongside pita wedges with slight charred marks.
Notes
Ensure the cucumber is as dry as possible to prevent the tzatziki from becoming watery.

Join the Savory Crafted Community
The beauty of an Authentic Tzatziki Recipe lies in its simplicity and the quality of its ingredients. We hope this guide helps you achieve that perfect “handheld smartphone photo” result in your own kitchen.
Did you get those perfect charred marks on your pita? Did your olive oil pool just right? Let us know in the comments below! If you enjoyed this recipe, please share your creations and follow us on Pinterest for more culinary inspiration.
Don’t forget to sign up for our newsletter to receive weekly professional-grade recipes and SEO-optimized cooking tips delivered straight to your inbox.