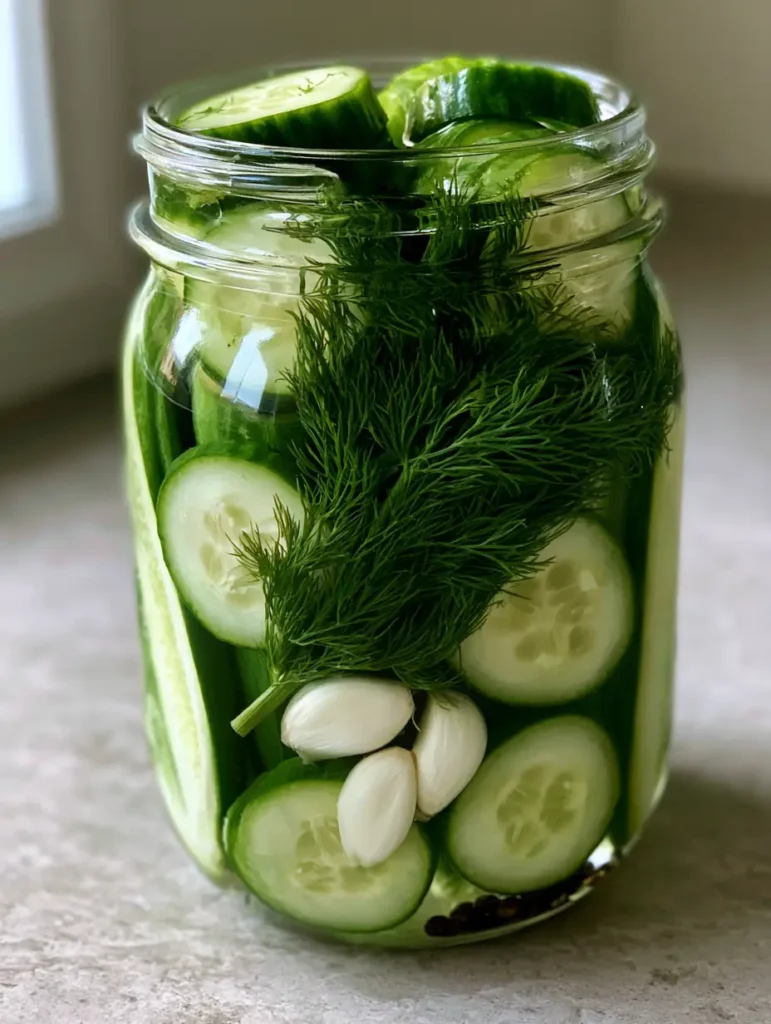
There is nothing quite like the satisfying “snap” of homemade refrigerator pickles. When you see that clear glass mason jar filled with vibrant green cucumber rounds and spears, you know you are in for a treat that no store-bought version can match. This recipe is designed for the home cook who wants maximum crunch and bold, garlicky flavor without the hassle of traditional canning. These refrigerator pickles are the perfect companion to your summer grilling or as a zesty snack straight from the fridge.
The beauty of this method lies in the preservation of the cucumber’s cellular structure. By using a quick-brine technique, we maintain that bright green skin and a pale, crisp-looking interior that looks stunning through the glass. Whether you are piling these onto a loaded chicken club sandwich or serving them alongside a hearty dinner, the visual appeal is just as impressive as the flavor profile.
Why These Are the Best Refrigerator Pickles You Will Ever Make
- Unmatched Texture: We use specific cooling techniques to ensure every bite provides a loud, audible crunch.
- Visual Masterpiece: The combination of feathery green dill, whole peeled garlic, and black peppercorns creates a Pinterest-worthy aesthetic in every jar.
- Zero Special Equipment: You don’t need a pressure canner; a simple mason jar and your refrigerator do all the work.
- Customizable Shapes: This recipe includes instructions for both classic rounds and vertical spears to suit any occasion.
- Versatile Flavor: These pickles pair perfectly with everything from garlic butter steak bites to casual backyard burgers.
The Anatomy of the Perfect Quick Pickle Brine
To achieve the signature tang of refrigerator pickles, the ratio of acidity to salt must be precise. We use a transparent vinegar brine that allows the natural colors of the vegetables to shine through. The ingredients below are selected not just for flavor, but for their ability to maintain the cucumber’s integrity over time.
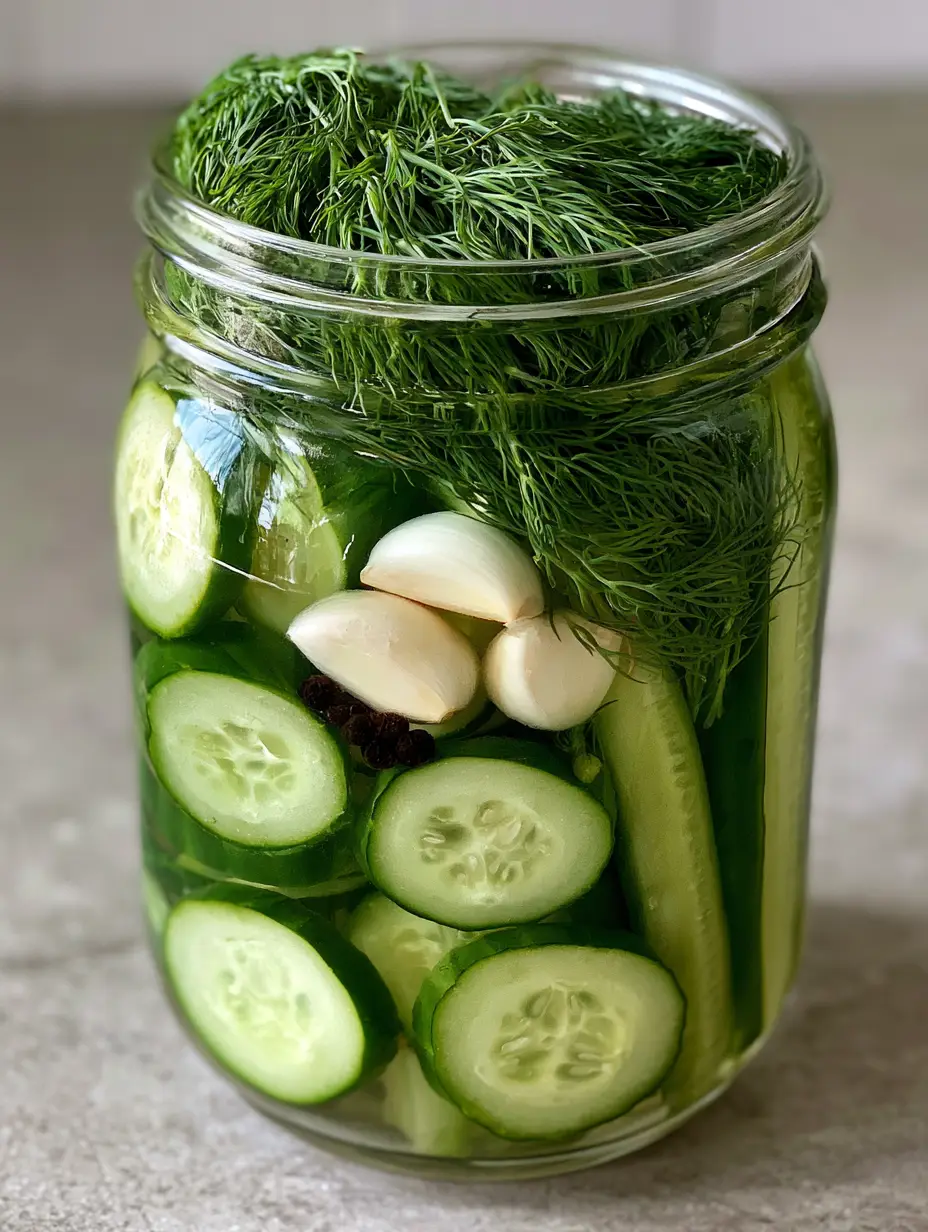
Fresh Cucumbers: You will need 2 lbs (907g) of firm cucumbers. We recommend Kirby or Persian varieties for their thin skins and small seeds, ensuring that bright green skin and pale, crisp interior we see in the visual blueprint.
Distilled White Vinegar: 1.5 cups (355ml). This provides the clean, sharp acidity required to “pick up” the flavors of the aromatics without clouding the brine.
Filtered Water: 1.5 cups (355ml). Diluting the vinegar ensures the pickles are tangy but not overpowering.
Pickling Salt: 2 tablespoons (34g). Unlike table salt, pickling salt has no anti-caking agents, which keeps your brine transparent and clear.
Granulated Sugar: 1 tablespoon (12g). A small amount of sugar balances the acidity without making the pickles “sweet.”
Whole Garlic Cloves: 3 large cloves, peeled. These infuse the brine with a pungent, savory depth that develops more intensely over 48 hours.
Fresh Dill Sprigs: 4-5 large, feathery sprigs. Fresh dill provides the essential “pickle” aroma that dried seeds simply cannot replicate.
Black Peppercorns: 1 teaspoon (approx. 5g). These add a subtle, woody heat and look beautiful settled at the bottom of the glass jar.
How to Prep Your Cucumbers for Maximum Crunch
Selecting and Slicing the Fruit
Start with cucumbers that feel heavy for their size and have no soft spots. For this recipe, we are creating a mix of textures. Slice half of your cucumbers into 1/4-inch (6mm) rounds. These are perfect for topping sandwiches like our high protein Italian pasta salad or snacking.
For the remaining cucumbers, slice them into vertical spears. Cut them to a height that sits roughly 1/2 inch (12mm) below the rim of your mason jar. This ensures they stay fully submerged in the transparent vinegar brine. Submergence is key to preventing spoilage and maintaining that fresh, pale interior.
The Secret Cold Soak
If you want the absolute crispiest refrigerator pickles, soak your sliced cucumbers in a bowl of ice water for 30 minutes before packing. This hydrates the cells and ensures they stay firm when the hot brine hits them. Pat them completely dry before proceeding to the next step.
Packing the Mason Jar for Visual Impact
Layering the Aromatics
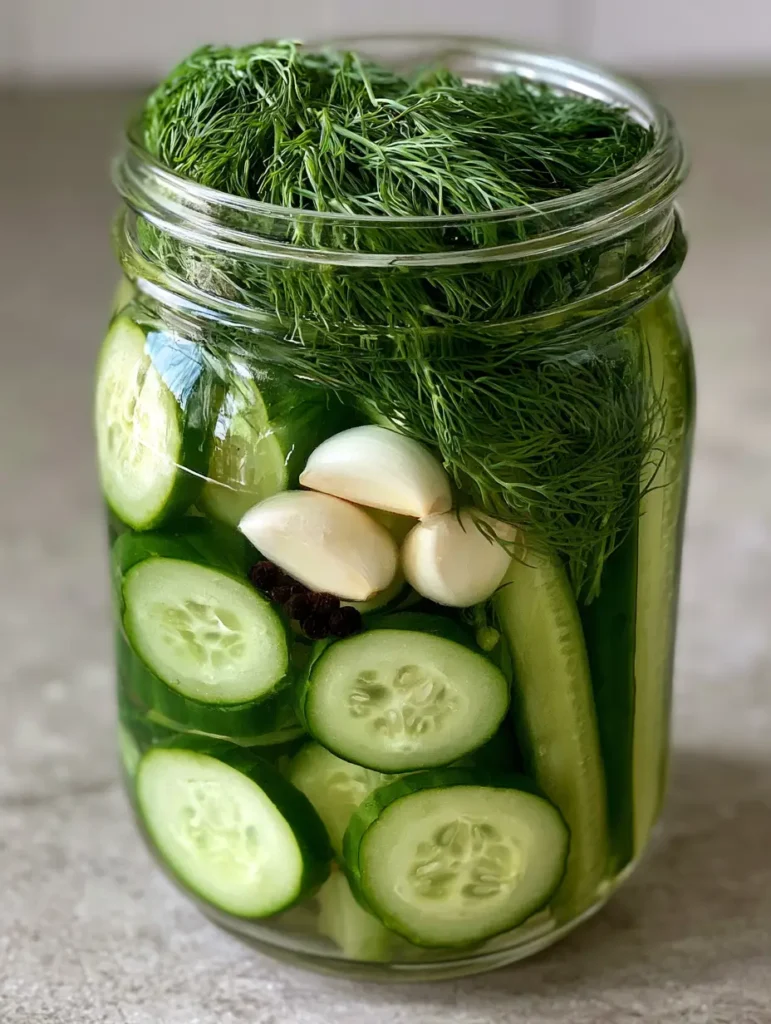
Take your clean, clear glass mason jar. Drop in three whole peeled white garlic cloves and a small handful of black peppercorns. This ensures the flavors are distributed from the bottom up as the brine circulates.
The Vertical Pack
Slide the vertical spears into the jar first. Pack them tightly so they stand upright against the glass. Once the spears are snug, fill the remaining gaps and the top of the jar with the cucumber rounds. This creates a “brim-full” look that is visually stunning under soft natural daylight.
Integrating the Dill
Tuck several large sprigs of fresh feathery green dill between the cucumbers and the glass. Not only does this maximize flavor contact, but it creates that iconic artisanal look seen on high-performing Pinterest pins.
Crafting the Transparent Vinegar Brine
Simmering the Base
In a small stainless steel saucepan, combine the vinegar, water, salt, and sugar. Heat over medium-high heat, stirring occasionally. You aren’t looking for a rolling boil—just enough heat to completely dissolve the salt and sugar crystals. Once the liquid is clear and transparent, remove it from the heat.
The Pouring Technique
Slowly pour the warm brine over the cucumbers in the jar. Fill it until the cucumbers are completely submerged, leaving about 1/4 inch (6mm) of headspace at the top. You should see the black peppercorns dancing in the liquid and the garlic cloves nestled at the bottom.
Cooling and Curing
Let the jar sit on your light gray stone countertop at room temperature until the glass is cool to the touch. This usually takes about 1-2 hours. Seal the lid tightly and place the jar in the back of the refrigerator—the coldest spot—for at least 24 hours. For the best flavor, wait 48-72 hours before your first taste.
Expert Tips for Pinterest-Perfect Pickles
- Use Fresh Dill: Never substitute dried dill weed for fresh sprigs if you want that vibrant, feathery look in your jar.
- Check the Salt: Always use pickling or Kosher salt. Table salt contains iodine which can turn your refrigerator pickles a dark, unappetizing color.
- Tight Pack: Cucumbers shrink slightly as they pickle. Pack the jar tighter than you think you need to prevent them from floating.
- The Tannin Trick: If you want extra crunch, add a clean grape leaf or a pinch of loose black tea to the jar. The tannins help keep the cucumber skins snap-crisp.
Storage and Shelf Life
Because these are refrigerator pickles and not shelf-stable canned goods, they must be stored in the fridge at all times. They will remain safe to eat and perfectly crunchy for up to 4 weeks. After a month, the cucumbers may begin to lose their “snap” and become slightly soft, though they are still safe to consume as long as the brine remains clear.
Do not freeze these pickles. The freezing process breaks down the cell walls of the cucumber, resulting in a mushy mess once thawed. Always use a clean fork to remove pickles from the jar to avoid introducing bacteria into the brine.
What to Serve with Your Homemade Pickles
These pickles are the ultimate palate cleanser. Their acidity cuts through the richness of meats and cheeses beautifully. Pair them with dill pickle ranch smash chicken tacos for a double dose of dill flavor. They also provide a sharp contrast to the creamy textures found in a Mediterranean pasta salad. For a simple snack, serve them on a charcuterie board with sharp cheddar and crusty bread.
Frequently Asked Questions
It is not recommended to reuse the brine for a second batch of pickles. The water content from the first batch of cucumbers dilutes the acidity and salt concentration, which can lead to spoilage or mushy results.
Yes, peeling the garlic cloves allows the essential oils and flavors to infuse directly into the vinegar brine. Whole peeled cloves also look much cleaner and more professional in the jar.
While you can eat them after 24 hours, the flavors of the garlic and dill fully penetrate the cucumbers after 48 to 72 hours. Patience results in a much bolder taste!
Soft pickles often result from using cucumbers that aren’t fresh or skipping the ice water soak. For the best snap, use Kirby cucumbers and ensure the blossom end is trimmed, as it contains enzymes that can soften the fruit.
Cloudy brine is usually caused by using table salt with anti-caking agents or minerals in hard water. To keep your brine transparent, always use pickling salt and filtered water.
The Official Garlic Dill Refrigerator Pickles Recipe
Refrigerator Pickles: The Ultimate Garlic Dill Mason Jar Recipe
Ingredients
Equipment
Method
- Slice half the cucumbers into rounds and the other half into vertical spears. Soak in ice water for 30 minutes for extra crunch.
- In a clean mason jar, add peeled garlic, peppercorns, and dill sprigs. Pack cucumbers tightly into the jar, mixing rounds and spears.
- Combine vinegar, water, salt, and sugar in a saucepan. Heat until crystals are fully dissolved and brine is transparent.
- Pour the warm brine over the cucumbers until submerged. Let cool at room temperature on the counter.
- Seal the jar and refrigerate for at least 24-48 hours before eating to allow flavors to develop.
Notes
Use only pickling salt to ensure the brine remains clear.
Join the SavoryCrafted Community!
If you loved making these refrigerator pickles, don’t forget to save this recipe to your Pinterest boards! Following savorycrafted ensures you never miss a crispy, crunchy update. We love seeing your kitchen creations—take a photo of your beautiful jars on your countertop and share it in the comments below. Your feedback helps us grow, so please leave a 5-star rating if these are the best pickles you’ve ever tasted!