There is nothing quite as evocative in the world of barbecue as a perfectly rendered, Oven Baked Beef Brisket that mimics the deep, smoky soul of a Texas pit. When you pull this tray out of the oven, the first thing you notice is the heavy, dark, peppery charred crust—a bark so thick and savory it crunches before it melts.
As you slice through the exterior, the knife glides into a moist, glistening, and fibrous interior that represents hours of patient, low-and-slow cooking. Small amounts of rendered beef fat and rich juices pool on the dark metal tray, reflecting the soft natural daylight in your kitchen.
This recipe is designed to bridge the gap between outdoor pitmastery and indoor convenience without sacrificing a single ounce of flavor or texture. We are focusing on the purity of the meat, the bite of the pepper, and the scientific breakdown of connective tissue to ensure every slice is as tender as a dream.
The Essential Elements for a Texas-Style Brisket Bark
Achieving a professional-grade result requires more than just heat; it requires a specific set of high-quality ingredients that work together to create that signature glistening finish.
- The Centerpiece: A 5-6 lb (2.2-2.7 kg) beef brisket flat or packer, trimmed to leave a 1/4-inch fat cap for natural basting.
- The Bark Builder: 1/4 cup (30g) coarse ground black pepper provides the “bite” and the structural foundation for the dark, charred exterior.
- The Flavor Enhancer: 1/4 cup (45g) coarse Kosher salt penetrates the meat deeply to season the fibers while drawing out moisture for the Maillard reaction.
- The Secret Binder: 2 tbsp (30ml) yellow mustard or beef tallow acts as a “glue” for the rub without altering the final beefy flavor profile.
- The Texture Protector: 1/2 cup (120ml) beef bone broth or water, used in the wrapping stage to maintain that moist, glistening interior.

Why This Oven Method Rivals the Smoker
Many home cooks feel intimidated by the idea of an Oven Baked Beef Brisket, fearing it will lack the complexity of a wood-fired version. However, by mastering the “Texas Crutch” and utilizing a high-protein dry rub, you can achieve a result that is visually and texturally indistinguishable from the best BBQ joints.
The beauty of this method lies in the controlled environment of your oven, which prevents the meat from drying out due to fluctuating airflow. You get a consistent, even render of the intramuscular fat, leading to that fibrous, pull-apart texture seen in high-end culinary photography.
Because we aren’t using heavy wood smoke, the pure flavor of the beef is allowed to shine, highlighted only by the sharp, aromatic crack of the black pepper. It is a sophisticated, minimalist approach to comfort food that feels right at home on a dark slate serving board.
Tools for Precision Brisket Roasting
To recreate the exact visual of thick slices arranged on a black metal tray, you will need a few specific pieces of kitchen gear. Precision is the difference between a tough roast and a legendary brisket.
A heavy-duty, black rectangular metal baking tray is essential for both roasting and the final presentation. The dark surface helps absorb and radiate heat evenly, contributing to the development of the bottom bark.
You will also need high-quality butcher paper or heavy-duty aluminum foil. Butcher paper is preferred by professionals as it allows the meat to “breathe” slightly, preserving the integrity of the peppery crust while still steaming the interior to tenderness.
Finally, a digital meat thermometer is non-negotiable. We are looking for a specific internal temperature—not a specific time—to know exactly when the collagen has transformed into gelatin.
The Step-by-Step Path to Melt-in-Your-Mouth Brisket
Preparing the Canvas for the Peppery Rub
Start by patting your brisket completely dry with paper towels. Any surface moisture will interfere with the “bark” formation, as steam is the enemy of a charred crust.
Trim the fat cap until it is an even 1/4 inch (0.6cm) thick; this ensures that as the fat renders, it bastes the meat without leaving a greasy, unappetizing layer. Apply a very thin coating of beef tallow or mustard to the entire surface of the meat.
Applying the Heavy Black Pepper Crust
In a small bowl, mix your coarse salt and cracked black pepper. Do not use fine-ground table pepper; you need the large, jagged pieces of pepper to create the physical “bark” texture described in the visual blueprint.
Generously coat every inch of the brisket with the rub, pressing it firmly into the meat with your palms. You should barely be able to see the red of the meat through the seasoning; this is how we achieve that heavy, dark, charred appearance after the long roast.
The Low and Slow Transformation
Preheat your oven to 250°F (120°C). Place the seasoned brisket on a wire rack set over your black metal baking tray. This allows air to circulate entirely around the meat, ensuring the bottom doesn’t become soggy.
Slide the tray into the center of the oven and roast undisturbed for several hours. You are looking for the “stall”—a point where the internal temperature plateaus—usually around 165°F (74°C). At this stage, the exterior will look dark and mahogany-colored.

The Wrap and the Finish
Once the brisket hits the stall, remove it and wrap it tightly in butcher paper, adding a small splash of beef broth if you desire extra moisture. Return it to the oven and continue cooking until the internal temperature reaches a buttery 203°F (95°C).
The most critical step is the rest. Let the Oven Baked Beef Brisket sit in its paper for at least 1-2 hours in a room-temperature spot. This allows the juices to redistribute, ensuring that when you slice it, the interior remains moist and glistening rather than bleeding out onto the tray.
Expert Tips for a Professional Bark
- The Fingertip Test: When checking the bark before wrapping, touch it gently. It should feel set and slightly gritty, not mushy or wet.
- Slicing Strategy: Always slice against the grain. Look for the long muscle fibers and cut perpendicular to them to ensure maximum tenderness in every bite.
- Temperature, Not Time: Every brisket is different. Use your thermometer as the ultimate guide rather than the clock to avoid a dry result.
- The Fat Cap Position: Roast with the fat cap facing up. This allows the rendering fat to wash over the meat throughout the long cooking process.
Pairing Your Brisket with Spectacular Sides
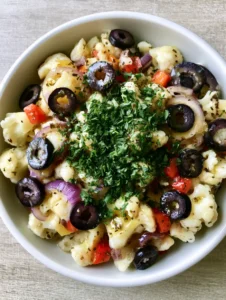
While this Oven Baked Beef Brisket is the undisputed star, it shines brightest when surrounded by the right supporting cast. To cut through the richness of the rendered fat, consider a bright salad with a creamy balsamic dressing.
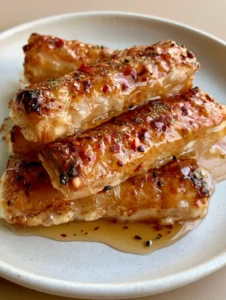
If you are looking to create a multi-protein feast, these slices look incredible next to some charred garlic butter steak bites. For those who love a bit of fusion, leftover brisket is the perfect filling for crunchy BBQ egg rolls the following day.
Don’t forget the bread! A warm piece of garlic naan bread is surprisingly effective at soaking up the pooling juices and rendered fat from the black tray.
Maintaining Freshness: Storage and Reheating
If you happen to have leftovers, wrap the unsliced portion of the brisket tightly in plastic wrap and then foil. It will stay fresh in the refrigerator for up to 4 days.
To reheat without drying out the meat, place the slices in a baking dish with a tablespoon of water or broth, cover tightly with foil, and warm at 300°F (150°C) until just heated through. This preserves the moist, glistening interior we worked so hard to achieve.
Frequently Asked Questions
No, do not flip the brisket. Keeping the fat cap up allows the fat to render and naturally baste the meat throughout the entire process, while the bottom forms a solid crust against the rack.
The key is a heavy application of coarse cracked black pepper and a low, consistent temperature. The pepper creates the physical structure for the bark, while the low heat allows the Maillard reaction to occur over several hours without burning the meat.
Generally, plan for about 60-90 minutes per pound. For a 5lb brisket, this usually equates to 6-8 hours of total cooking time, including the wrapped stage, but always cook to internal temperature rather than time.
Butcher paper is superior for bark. It is porous enough to let steam escape, which prevents the crust from becoming soggy, whereas foil traps all moisture and can result in a ‘pot roast’ texture.
Brisket remains tough if the collagen hasn’t fully broken down. This usually happens if the internal temperature hasn’t reached the 200°F-205°F (93°C-96°C) range, or if the meat wasn’t allowed to rest for at least an hour after cooking.
The Ultimate Oven Baked Beef Brisket Recipe

Oven Baked Beef Brisket with a Crusted Peppery Bark
Ingredients
Equipment
Method
- Pat the brisket dry. Trim the fat cap to 1/4 inch (0.6cm). Apply a thin layer of mustard over the entire surface to act as a binder.
- Mix salt and pepper. Generously coat the meat, pressing the rub in to ensure a heavy, dark crust develops during roasting.
- Place on a rack in a black metal tray at 250°F (120°C). Roast until the internal temperature hits 165°F (74°C) and the bark is dark and set.
- Wrap the brisket tightly in butcher paper with a splash of beef broth. Return to the oven until it reaches an internal temp of 203°F (95°C).
- Remove from oven and let rest in the paper for at least 1-2 hours before slicing against the grain into thick pieces.
Notes
Resting is non-negotiable for a glistening, moist interior.

Closing the Kitchen for the Day
Mastering the Oven Baked Beef Brisket is a rite of passage for any serious home cook. It transforms a humble, tough cut of meat into a masterpiece of texture and flavor that commands attention on any dinner table.
We hope you enjoy the process of watching that peppery bark develop and the satisfaction of that first, tender bite. If you loved this recipe, please leave a comment below and share your results with us on Pinterest. Happy roasting!
“`json
{
“faq_items”: [
{
“question”: “How do I get a dark bark on brisket in the oven?”,
“answer”: “The key is a heavy application of coarse cracked black pepper and a low, consistent temperature. The pepper creates the physical structure for the bark, while the low heat allows the Maillard reaction to occur over several hours without burning the meat.”
},
{
“question”: “Should I wrap my brisket in foil or butcher paper?”,
“answer”: “Butcher paper is superior for bark. It is porous enough to let steam escape, which prevents the crust from becoming soggy, whereas foil traps all moisture and can result in a ‘pot roast’ texture.”
},
{
“question”: “Why is my oven-baked brisket tough?”,
“answer”: “Brisket remains tough if the collagen hasn’t fully broken down. This usually happens if the internal temperature hasn’t reached the 200°F-205°F (93°C-96°C) range, or if the meat wasn’t allowed to rest for at least an hour after cooking.”
},
{
“question”: “Do I need to flip the brisket in the oven?”,
“answer”: “No, do not flip the brisket. Keeping the fat cap up allows the fat to render and naturally baste the meat throughout the entire process, while the bottom forms a solid crust against the rack.”
}
]
}
“`